So now Knoppix is working, and you can work with the applications on the CD. You have also got access to your hard drives, thanks to the auto-detection of Knoppix, but if they're in NTFS format, they're probably read-only. In order to write our files to somewhere other than the Ramdrive (which of course gets wiped when you shut down), we're going to have to connect up some peripheral devices.
Note that if you're using Knoppix to test hardware in the shop before buying, it's good to check peripheral connectivity as well. Will the ports on that laptop talk to your gadget?
We'll start with the built-in file systems first, to get the ideas, and then move on to external devices.
This is the simplest of the lot, built-in hard drives will be detected by Knoppix at boot-up, and they will
be available without any messing about. Note however that they won't automatically be mounted, so although
you'll have directories called /mnt/hda1 or /mnt/hda2, they will look empty until they're
explicitly mounted. To do this, the easiest way is to just click (single left-click) on the desktop icon for the
hard drive you want. This will mount the drive, and then open a Konqueror window to show you what's inside.
After you've done that, the drive contents will be available to the knoppix user in all shells and
applications.
On this desktop machine, I get 3 drives available, /mnt/hda1 seems to be a boot partition (which is
not shown by Windows), /mnt/hda2 corresponds to the C: drive, and /mnt/hda3
to the other partition, corresponding to the E: drive. They're all NTFS format, which means Knoppix
can read them but can't write to them.
Yes, they're old, yes they've only got a tiny capacity and relatively fragile, but they're still around. This
desktop has one, normal 1.44 MB floppy drive, which also gets automatically recognised by Knoppix and offered as
a mount point /mnt/floppy. Somewhat inconsistently, this doesn't need to be mounted before it's read,
but beware. It definitely needs to be unmounted before you take it out!! If you're working with the disk,
and then take it out before you shut down Knoppix, you'll get a screenful of error messages and more than likely
a corrupt disk which you'll then have to reformat to rescue. You have been warned.
If you have a disk which has been formatted by Windows, it's probably got a DOS format, which Knoppix can happily read from and write to. So it's one of the easiest ways to get files from Knoppix into your Windows system.
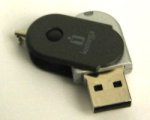
How times change. They're much more convenient than a floppy, able to store thousands of times more data, don't require any drives to be installed on the machine, they just need a USB port and the ability to drive it. These marvellous little gadgets have now shrunk to a size not much bigger than the USB plug itself, and make a great and portable way to store and carry data. Interestingly on the box for this drive (an Iomega MicroMini), it specifically says which hardware it requires, and lists Windows 98/ME/2000/XP, Mac OS 8/9, and Linux 2.4.x (my emphasis) - a welcome message.
Simply plug the drive into a USB port before booting Knoppix, and it will automatically get detected like the hard drives did. Here, the drive appears as "Hard Disk Partition [sda1]", indicating that it behaves like a hard drive. They require mounting in the same way, and they probably require changing the access to read/write if you also want to write to them. To do this, right-click on the desktop icon and select Actions-Change read/write mode.
It should also be possible to mount the drive using the mount command from a shell, but because this only
works as root, and because it seems impossible to change the permissions on the drive thus created, the files on the
mounted drive are only accessible by the root user. Bad. It seems the only way to mount it so that it can be seen
by the regular knoppix user is to click the desktop icon (or right-click and select 'mount').
This particular PC being used for testing is running Windows NT, which has no support for USB, so Knoppix is already adding features and usability that wasn't there before!
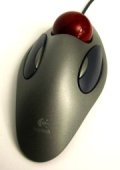
Couldn't be simpler. This is a trackball with a USB plug, plug it in and it just goes. It also has a little adaptor to plug it in the PS2 port instead, and that also works. The only niggle is the functionality of the two smaller buttons. The left one acts as a middle mouse button (disconcertingly pasting selecting text into the cursor, not very nice at all if you're not expecting it!) and the right one just acts as a right mouse button. No doubt this is programmable somewhere, but in the meantime the hoped-for scrolling functionality isn't there.
Now it starts getting a little trickier in terms of getting the gadgets to work, but not yet too tricky. Next up is a handheld GPS (a Garmin eTrex Vista), which comes with a cable to the serial port. On Windows this didn't need any drivers to be installed, but did require a program called Gartrip to handle the downloading and uploading of waypoints and tracks to the device. Unfortunately, Gartrip only runs on Windows so this is the first test of how Knoppix can cope.
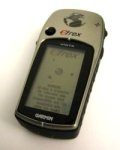
Step 1 is to find out if Knoppix even has support for the serial port, and if so where it is. The GPS certainly won't appear as a mount point like the USB drive, because it works in a different way, it doesn't offer files in a file system, but rather responds to commands and sends data back. So we need to do some hunting around.
A simple "man -k gps" comes up with an early success - Knoppix comes with a program called GpsDrive,
but this is not too beginner-friendly and doesn't offer to download waypoints or tracks. It references another
program called garble, but that's not too obvious either, I need to know how the serial port is represented in Knoppix.
Some more googling, and I find a troubleshooting guide for GPS communications, which talks about a Windows
application called Hyperterminal. As a first step, this lets you just see whether the serial port is working or not.
For this, the GPS needs to be in "NMEA" mode, which means it just transmits current position information at regular
intervals. Not very useful for downloading waypoints, but good for testing connections. This works fine with Hyperterminal,
as long as the settings are to use Com2, 4800 bits per second, 8 Data bits, no parity, 1 stop bit and no flow control.
So I try the same with Knoppix, and find a serial port application called minicom. Unfortunately, despite
much experimentation and trial-and-error, I couldn't get minicom to recognise the GPS or show any streaming data, even
though the settings were the same as for Hyperterminal. The status bar constantly shows "offline", indicating perhaps
that's it's expecting some kind of handshaking or initialisation to take place before it recognises the connection.
Update: it seems that minicom needs to be closed and restarted
before accepting the settings. Doing this, it shows the streaming data when the GPS is in NMEA mode.
Undaunted, I go back to garble and try the various devices in /dev/ttyS*. Not forgetting to reset
the GPS mode back to Garmin (garble just gets timeouts if the GPS is on NMEA mode), I call garble -d /dev/ttyS1 --get-time
and sure enough it reports the current time. A lot of trouble just to find out the time, perhaps, but we now know that
the serial port is working and Knoppix can talk to the GPS.
To download the waypoints, we use garble -d /dev/ttyS1 --get-waypoints, and here's our disappointment-
although it works, and the waypoints are successfully downloaded and displayed on the screen, the waypoint names are mangled
in that the first 4 characters are lost. Not a show-stopper but very annoying. Trying garble -d /dev/ttyS1 --get-tracks
brings another disappointment- the altitudes of the track points are lost as well. So the good news is that the serial port
is working, but the bad news is that the software is not.
The natural response to this, in this bright new world of open source (and truly free) software, is to get the garble source
and see what's wrong. Unfortunately this wasn't a good place to start, the garble source on sourceforge is at version 1.0.1
whereas garble --version gives 1.0.2. But I bravely leap in and eventually compile this 1.0.1 code, to find that
it no longer mangles the waypoint names, keeping them at 10 characters long, but also no longer keeps the waypoint altitudes.
And so, cutting a long story not much shorter, I modified the source so that it preserved the waypoint names and their altitudes,
and also the track point altitudes, and got it to compile and run. A successful mini-project.
Addendum: Naturally, in this bright new world, I offered my patch to the GpsDrive maintainer, as he included garble 1.0.2 in his GpsDrive package. He brusquely shrugged me off to the garble maintainer (who doesn't seem to know anything about GpsDrive's version of garble 1.0.2), and so it remains unupdated. Emails and bug reports on garble's sourceforge page remain unanswered.
Update: three new applications for reading the GPS data (gpsbabel,
gpspoint and PyGarmin) are discussed in the Mandriva peripherals page.
The source code for version 1.1 of garble is also available in the
downloads section.
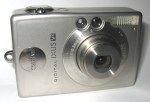
Next up to be connected is a digital camera, which came with a USB cable. Of course this machine has been running Windows NT so it's never been connected up before. The camera came with CDs to install drivers and software and all sorts of things, so optimism is not too high on this one - I'm fearing the worst about the availability of drivers on non-Windows platforms and am resigned to the fact that a card reader may be necessary (see below).
Connecting the camera is just a question of plugging it in and powering it up, then you can use usbview to
make sure it's been detected (it says "Canon Digital Camera" which is very encouraging!). There's an application
called gtkam which offers a very friendly menu interface (Camera - Add Camera - Detect - OK) and then gives
you a tree to the file system to browse thumbnails. The pictures are stored in separate directories (rather than a flat
list as displayed in the camera itself), and you can then choose to save the ones you want to somewhere else.
Another way to get the pictures without so much clicking is to use gphoto2, a terse but very effective
command-line tool. gphoto2 --auto-detect gives a reassuring and precise message "Canon Digital IXUS v2"
and then --list-files gives you a list of filenames. At this point it calls the camera a "Canon:Powershot S200"
but that's the fault of Canon's international naming schemes rather than a fault of gphoto2. Create a directory for the
pictures, and call gphoto2 --get-all-files, and all the pictures (and movies) are copied over. Much much
easier than expected!
There are just 2 questions still remaining about this process - firstly I don't know where the camera is on the
/dev/ tree, and how (or if) it could be mounted as a file system. And secondly, I don't know why gphoto2
and gtkam only work when run as root. It would be nice to be able to run them as a normal user as well.
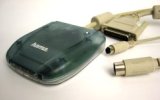
Because I didn't have the use of a USB port to interface with the camera earlier, I acquired a parallel port compact flash card reader. It's a little box with a slot for the camera's memory card, but rather than plugging into the USB port as normal card readers do, this one plugs into the parallel port. It's a bit of a kludge, as it needs to take the power (which would normally come from the USB) from somewhere else, and that happens to be the keyboard cable, so the wiring at the back is a bit messy. It's convenient to use though.
Under Windows NT, it needed a CD with drivers to be installed, which was of course Windows-specific, but then the card reader just appears as another removable drive in the file system, and files can be copied to and from with Explorer. Again, I was skeptical about the availability of the drivers here and wasn't sure if it was possible.
Googling for "parallel port linux" or "parallel port card reader" made me realise that these things aren't exactly common- I knew that I had had to look around to find a parallel port reader in amongst all the USB ones, but this looked tricky. The closest I could find were references to connecting a parallel port Zip drive with Linux, but it still took plenty of experimentation before I got anywhere.
First of all, parallel port support is kept in so-called "modules", which aren't available until you add them to the kernel.
Apparently. So some important tools are dmesg which lists messages from devices (pipe it to less or
redirect it to a file), lsmod which lists the modules currently installed, and modprobe which
doesn't really probe the modules but adds them to the kernel. Like activating them.
Two important things we need for this are parport and paride. There's some useful information
about both of them in the directory /usr/src/linux/Documentation in the files parport.txt and
paride.txt. If you start up Knoppix to the terminal prompt (knoppix 2), and look in the
/proc/sys/dev directory, you'll notice that parport is not mentioned. Similarly if I do a lsmod,
it doesn't mention parport. In the output from dmesg I can see that parport is listed, with the information:
This is great because those numbers (address 0x378 and 0x778, and irq 7) match what the Windows settings are (and also the BIOS settings, viewable from the boot setup). So now I can add the modules (in this order):
At this point it tells me that it's recognised the card, tells me that it's "removable media" and even tells me the size of the
compact flash card (19M). But I still can't see it. As a check, I can look at the files in /proc/sys/dev/parport/parport0,
and see that the base-addr is set to 888 and 1912, which are the decimal values of hex 378 and 778. Oddly the irq
is set to -1 rather than 7, and the devices/active is set to "none", but we'll carry on.
I can run dmesg again, and see that it was given the name
pda1. I can't mount that because I don't have a /dev/pda1. So I have to make one. Using the information in the
paride.txt file, I give the command mknod /dev/pda1 b 45 1 which makes a block device for pda1.
Then I can make my drive and mount it with mkdir /mnt/card and mount /dev/pda1 /mnt/card.
For some reason I still can't access the file system, but when I go into KDE and access it (as root) from there, it all works and I can copy files around. Another success.
Note: Don't try the above if you're running the 2.6 Linux kernel (selecting knoppix26 at boot time). On this
system it fails in a spectacular way, freezing the whole system (apparently repeatedly flooding the card reader with signals
and repeatedly receiving error messages) - an amusing state of affairs that can only be fixed by a power-off. Don't have
unsaved data if you're playing with this stuff.
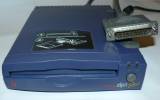
Another device hanging off the parallel port, this is an old 100MB Zip drive from Iomega going to the test. I tried this out because I wanted to archive some files on an old PC which didn't have a network card, USB sockets, or other fancy modern things like that. So a parallel port solution was ideal and the advantage over the card reader is that this zip drive takes its own mains power and so doesn't rely on a particular kind of keyboard cable.
I followed the recipe at the Knowing Knoppix Wikibook which worked a treat. According to this page, there are two types of interface used by Iomega, depending on the age of the drive. I didn't have a date printed on the drive, but it turned out to be the newer type. So the process went like this:
Firstly, boot Knoppix to the command prompt with knoppix 2 which takes you into the shell as root. Then load the required
modules with modprobe imm which creates the sda device. Then rebuild the file system table (which defines the mount points)
with rebuildfstab -r -u knoppix -g knoppix and that's about it! To get to the gui, type init 5 and the
desktop will come up, with an icon for the zip drive. Or if you want to stay in the shell you can do a ls /mnt/sd* to
find the mount point and then eg mount -w /mnt/sda1 to mount the drive as writeable.