
Components of the Shuttle K48 system
Now to see if I can put all these components together!

Components of the Shuttle K48 system
The main bit of the assembly is the barebone, the CPU, the RAM, the hard drive and the optical drive. That sounds like a manageable task. In this image you can see all these major components. The Shuttle case is on the right (with a blanking plate where the DVD will go and instructions on top), the RAM front left, the hard drive on top of the DVD drive, and the boxed CPU is at the back.
The Shuttle K48 comes with detailed instructions, although sometimes the english translations aren't the best. Surprisingly, the German instructions were much clearer (if you understand German). Basically you just have to follow everything step by step, do it slowly, and take care at all steps. You don't need any special tools for this assembly, just some small screwdrivers and a way to earth yourself.
What I write here shouldn't replace the official instructions in any way, but it might help to give an idea of how complicated the task is before you decide to go this route. As always, I'm not responsible if you break your computer.
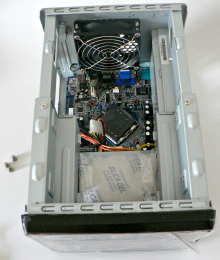
Inside the Shuttle K48 case
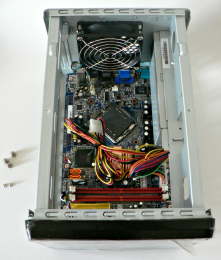
View after rack has been removed
The first thing to do is open up the case of this K48 and see what's inside. Just undo the three thumbscrews at the back and slide off the cover. At the top of the case is a rack which will hold the hard drive and DVD drive - in mine there was a big bag of silica gel taped to this rack too. This rack is just held on with two screws, which when undone let the rack just slide out.
Now you can see the mainboard, and the empty space for the CPU (in the middle of the pictures). The official instructions show an "ICE Genie cooling module" but this wasn't included in my system, so those instructions can be ignored. Take some time to look around the mainboard though, to spot the SATA and IDE connections which you'll need later, and the fan power supply. The slots for the RAM sticks are pretty obvious too. Now is a good time to read through all the instructions before you start, so you don't get surprised during assembly.
To get an overview of the mainboard, see the picture on page 5 of the specifications pdf.
Note that the SATA cable (for the hard drive) and the IDE cable (for the DVD drive) are in a separate plastic bag, but the power cables for both are already inside the case, already attached to the mainboard as shown in the second image.
This is the trickiest part, and the part that requires the most care. The CPU is really fragile and it must be handled very carefully. Earth yourself before opening anything.
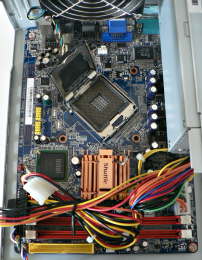
CPU socket with plastic protective cover
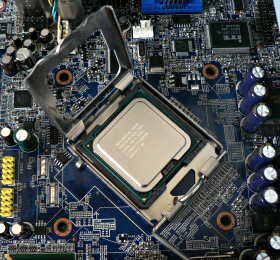
Open CPU socket with CPU installed
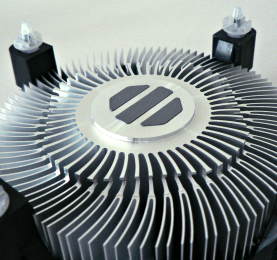
Underside of heat sink with thermal compound already on

Fan unit installed on top of CPU
Firstly open up the CPU socket as described, and take out the grey plastic cover - this is just to protect the socket before you put the CPU in. Check the orientation of the CPU and place it carefully onto the socket, and close the cover with the lever. It takes more force than I expected to close the lever but of course double-check everything.
Good, that's the hard part over.
The instructions say you have to spread thermal compound on the CPU, but as I bought a boxed CPU including fan, this thermal compound was already on the bottom of the fan unit, so I could skip this step. Making sure that the power cable can reach the socket properly, just drop in the fan unit and tighten the four plastic screws.
Next, carefully connect the power plug onto the appropriate connector. Again this took a little more force than I expected, so double-check the orientation of the connector. Also check that the fan can spin freely without catching on the power cables.
Again the instructions mention the ICE Genie cooling module but I didn't have one so I skipped this step.

Both RAM sticks installed
Carefully check the orientation of the RAM sticks and carefully insert into the slots. Press down firmly on both ends of the sticks (making sure to press exactly downwards, not to bend anything!) and insert them fully until the plastic catches can close. This can be quite stiff.
The yellow socket next to the RAM slots is for the IDE cable, which we'll use for the DVD drive shortly.
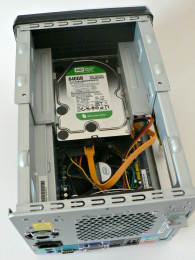
Hard drive now installed in rack
Now we're ready to put the rack back in, and install the hard drive in the bottom of the rack. Before you screw it in, make sure it's the right way round for connecting the power and the data cables. The power cable is already there (only one of the power cables fits the SATA power connector on the hard drive) and the orange SATA cable is provided in a separate bag.
It takes four little screws to attach the hard drive into the rack, and four extra screws are provided in case you want to put a second 3.5" hard drive in there too.
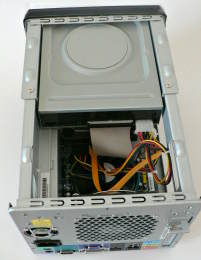
DVD drive installed in rack
Just like the hard drive, the DVD drive needs to be inserted into the rack, screwed firmly into place from the sides, and connected to power and data cables. This time we use the IDE ribbon cable which plugs into the long yellow slot next to the RAM - I'm not sure if the IDE cable is directional but I plugged the yellow end of my IDE cable into this yellow slot.
We also need to connect the power, using the other power cable with the two connectors. I used the first of these connectors just to make the wires a bit tidier.
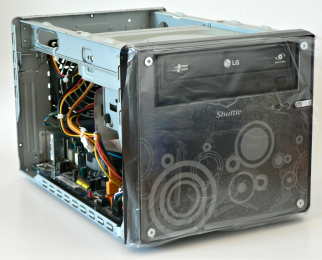
Cable ties on the side
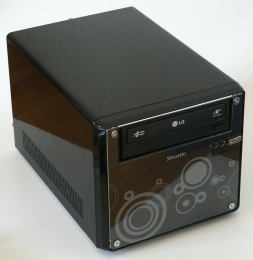
The fully assembled K48
Use the cable ties to secure the fan wires and the peripheral power wires, and make sure that the wires are well clear of the fan blades. Then double-check all the connectors, check that the RAM is secure, put the case back on and close with the three thumbscrews. And you're done!
Obviously you then need to connect the peripherals, which in my case were the monitor (DVI), the keyboard (PS/2), the trackball (USB) and the power. Pop in your favourite live CD (in this case, Debian Lenny), and away you go!
A couple of further notes, the K48 came with a CD which promised "drivers and utilities" but I assume those are only necessary for Microsoft systems because linux is quite happy without using this CD. Also when I was buying the components I got a warning that it might not be possible to install Windows on this machine without buying an additional 3.5" floppy drive! so that you could install drivers to be able to use the CD player... what a mess! No, you don't need any of that nonsense with a linux system, you're fine without having to buy redundant additional hardware.
My monitor includes speakers and a normal 3.5mm headphone socket for providing line-in. So I needed an audio cable to go from my Shuttle's headphone out socket with a 3.5mm headphone jack on both ends. This lets the sound come through the monitor which sounds great.
I also got a 4-port USB hub from Speedline so that I could access the USB ports easier (rather than scrabbling round the back of the Shuttle), but sadly the hub I got only has a tiny cable on it (barely longer than the hub). So I now also need a USB extension cable (A plug to A socket) to bring the hub up onto the desk.
As far as the custom front panel goes, well yes it is possible to take off the transparent cover on the front and put an image inside, instead of those grey circles, but the grey circles are part of the specially cut front sheet, so you'd need to cover up that part of the sheet and you'd see the join I think. I originally thought that I could take the circles thing away (assuming it was a transparent sheet on top of a black background) and replace it with my own transparent or cutout design (a tux, obviously), but as it's all one sheet it's not so easy to make it neat. So I'll stick with the circles for a while I think.